Backend & Auth Setup
Wire your app to Supabase (database + Google Sign-In) and RevenueCat (subscriptions), with the Supabase and Firebase MCP servers for AI-assisted setup.
Backend & Auth Setup
Before you can build for the stores, your app needs its backend connected: a Supabase project (database + auth), Google Sign-In, and RevenueCat (subscriptions). This guide wires all three, and adds the Supabase and Firebase MCP servers so your AI agent can inspect and configure them for you.
Screenshots below are from the Morrow Self reference app. Substitute your own project ref, bundle ID, URL scheme, and client IDs throughout.
1. Add the Supabase MCP server
A project-scoped MCP server lets your AI agent list tables, run SQL, and apply migrations against your remote Supabase project.
claude mcp add --scope project --transport http supabase \
  "https://mcp.supabase.com/mcp?project_ref=<YOUR_PROJECT_REF>"
This writes .mcp.json at the repo root (it holds only the public project ref —
no secrets). A freshly added server shows as ⏸ Pending approval in
claude mcp list — run claude once to approve it, then complete the OAuth
browser auth the first time its tools are used.
2. Environment variables (canonical names)
The Zod schema in src/config/env.ts requires these exact names. The most
common slip is EXPO_PUBLIC_SUPABASE_KEY — the code reads ..._ANON_KEY, so the
wrong name makes validateEnv() throw "Supabase anon key is required" and the
client never initializes.
EXPO_PUBLIC_SUPABASE_URL=https://<project_ref>.supabase.co
EXPO_PUBLIC_SUPABASE_ANON_KEY=<anon-public-key>   # NOT EXPO_PUBLIC_SUPABASE_KEY
EXPO_PUBLIC_GOOGLE_WEB_CLIENT_ID=<web-oauth-client-id>
EXPO_PUBLIC_GOOGLE_IOS_CLIENT_ID=<ios-oauth-client-id>
EXPO_PUBLIC_REVENUECAT_IOS_API_KEY=<appl_...>      # from step 5
EXPO_PUBLIC_REVENUECAT_ANDROID_API_KEY=<goog_...>  # from step 5
EAS Build does not read your local .env. Push it to the matching EAS
environment so builds get the values: eas env:push preview --path .env --force
(and production for store builds). The build profile's environment field
selects which set loads.
3. Enable Google Sign-In in Supabase
The app uses the native idToken flow (@react-native-google-signin →
supabase.auth.signInWithIdToken), so Supabase needs your Google client IDs
only — no client secret.
Add your SHA-1 to Firebase (Android). Get the authoritative key from your EAS-managed keystore — not the local debug keystore — then add it under Firebase Project Settings → your Android app:
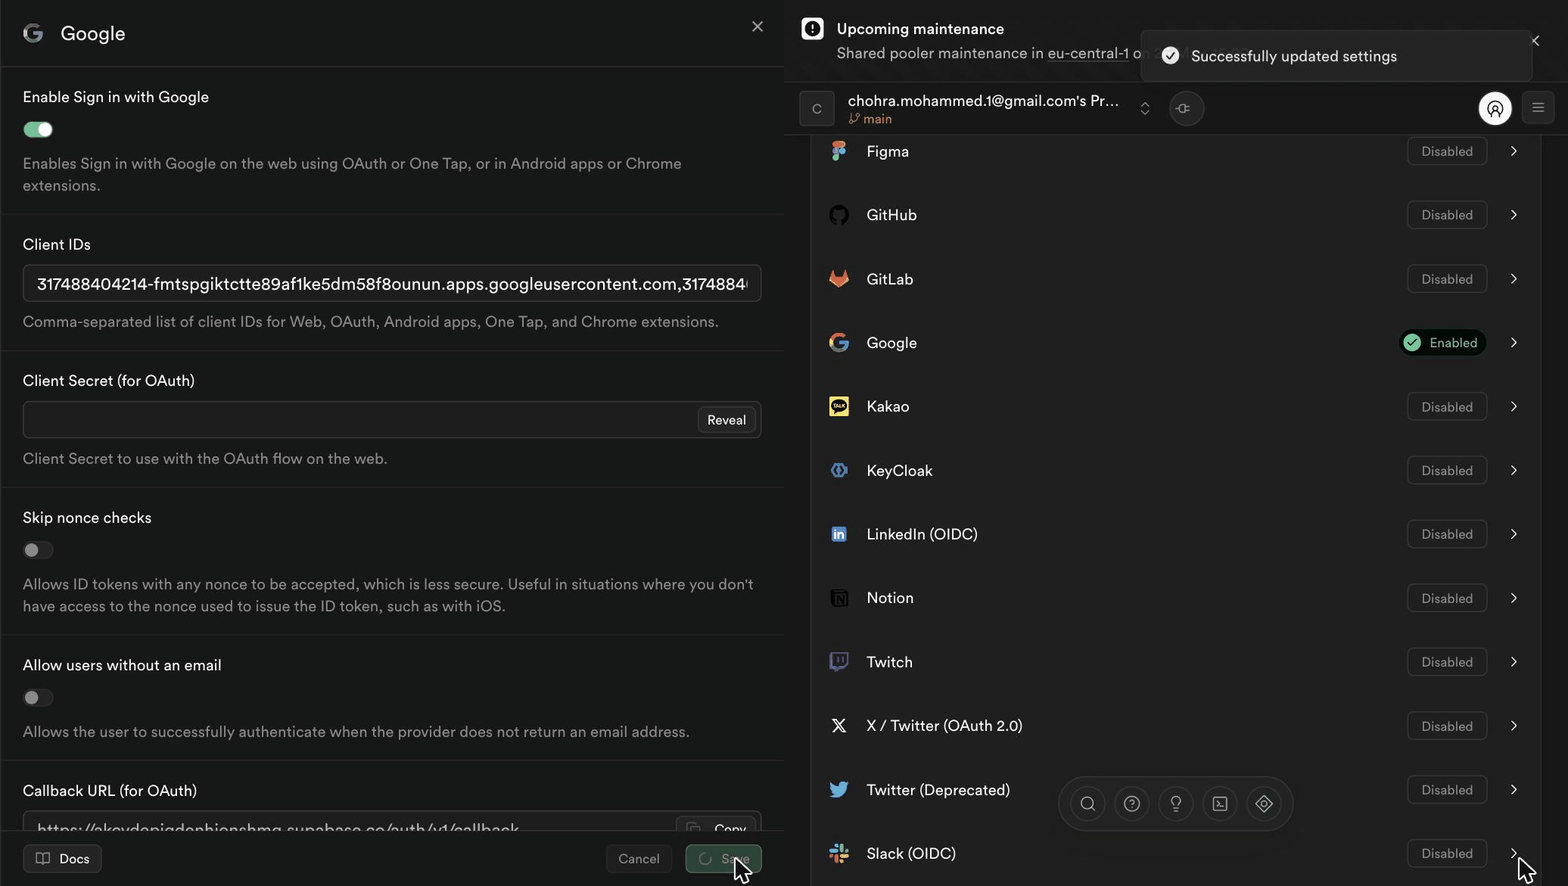
eas credentials -p android # copy the Keystore SHA1 FingerprintEnable the Google provider. Supabase → Authentication → Sign In / Providers → Google → enable it. Leave the Client ID/Secret for OAuth empty, and paste all your Google client IDs (Web, iOS, Android) into Authorized Client IDs, comma-separated. Save.
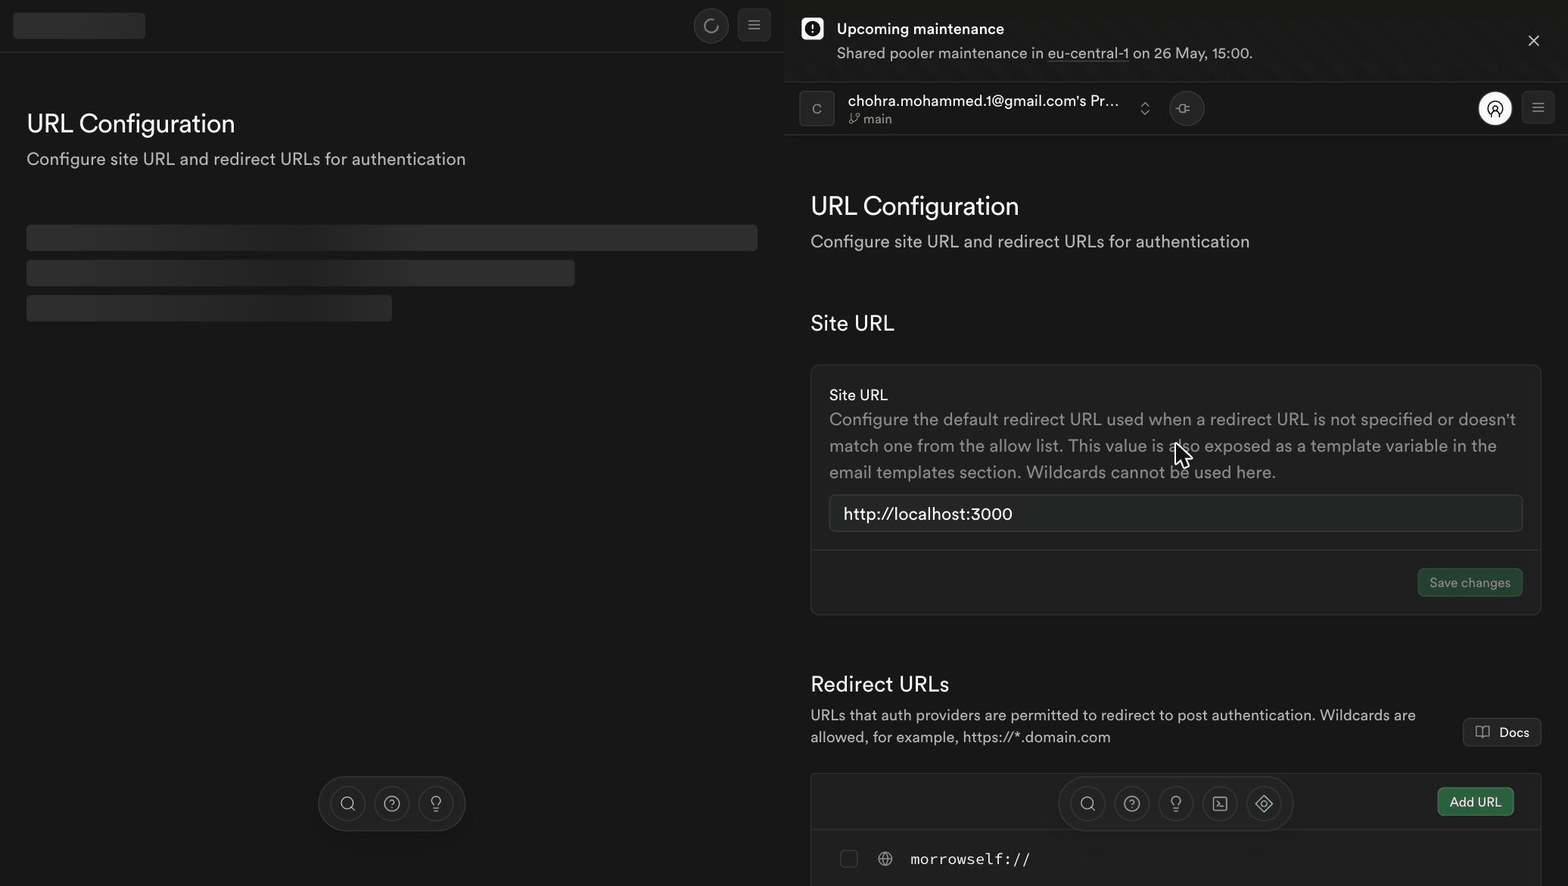
Add your deep-link scheme to the redirect allowlist. Authentication → URL
Configuration → add yourapp:// (e.g. morrowself://) to Redirect URLs.
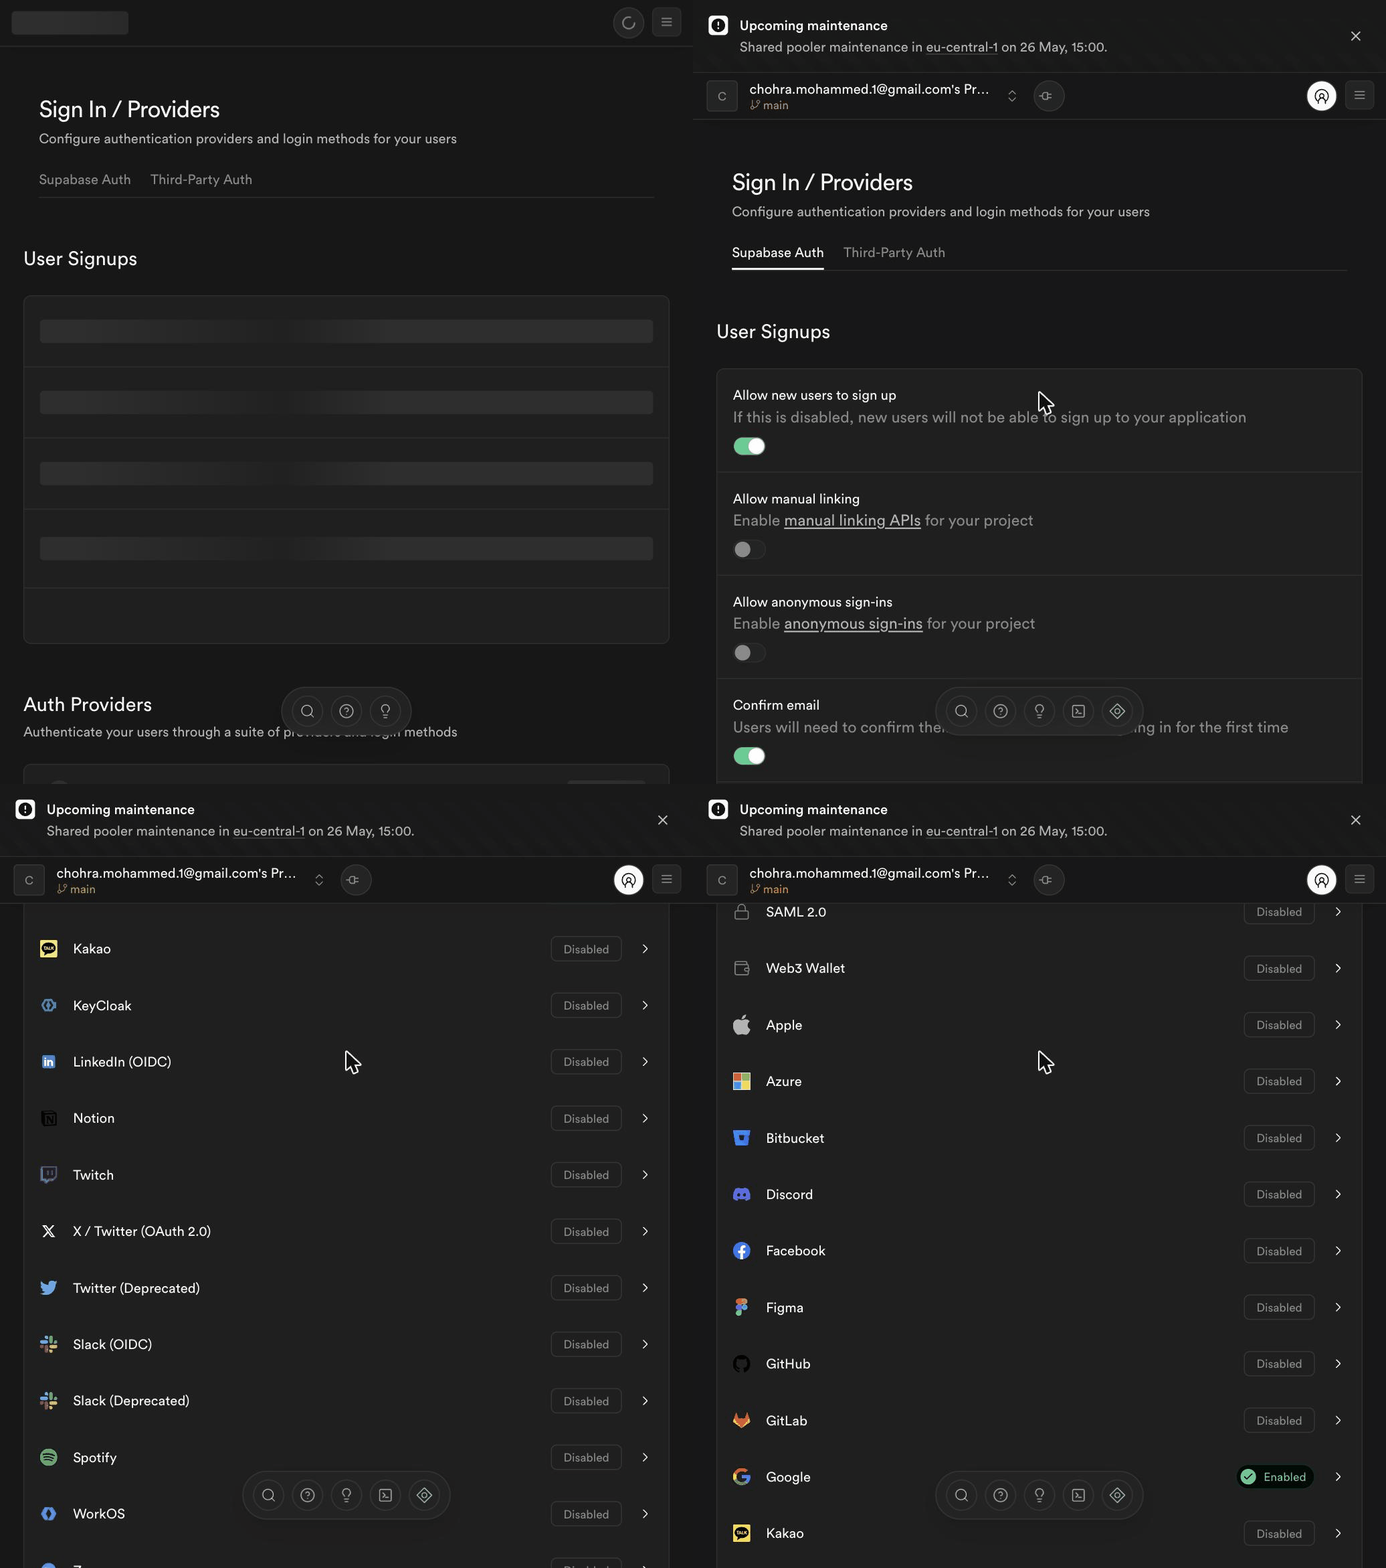
Confirm. The provider should now read Enabled with your client IDs saved.
4. Database schema
Apply your SQL to the remote project (run the files under database/schemas/ and
supabase/migrations/ in order). Note: the profiles table is required by
points.service.ts (gamification points + leaderboard), the export_user_data()
RPC, and the Database type — make sure your schema includes it.
# Option A — Supabase CLI
supabase link --project-ref <YOUR_PROJECT_REF>
supabase db push

# Option B — via the Supabase MCP (after step 1 approval): ask the agent to apply
#   the pending files, then list_tables to verify.

# Option C — paste each file into the Supabase SQL editor.
5. RevenueCat (subscriptions)
Order matters. RevenueCat's iOS/Android app configs require credentials from
the stores — the App Store Connect In-App Purchase P8 key (iOS) and the Google
Play service-account JSON (Android). Create your App Store Connect + Play app
records and those keys first; only then can RevenueCat emit the real
appl_ / goog_ SDK keys and link your real products.
Create the project and add an Apple App Store app + Google Play app, both using your bundle ID / package name.

Create the entitlement with identifier pro, add your three products
(monthly / annual / lifetime), and attach each to pro. Then create an offering
with identifier default containing the three packages, and set it as current.
Copy the public SDK keys. Project settings → API keys → copy the Apple key
(appl_…) and the Google key (goog_…) into your .env (step 2).
For local development you can use a RevenueCat test-store key (test_…) for
both platforms — the paywall loads test products without real store setup. The SDK
init is guarded, so an empty or test key never crashes the app. Never ship a
test key to your production EAS environment.
6. Firebase MCP (optional)
If you use Firebase (messaging/FCM, Crashlytics, Remote Config, or explicit Firebase properties), add its MCP server too. Unlike Supabase, Firebase's MCP runs locally via the Firebase CLI:
claude mcp add --scope project firebase -- npx -y firebase-tools@latest mcpPin the project in .firebaserc ({ "projects": { "default": "<your-project>" } }),
then authenticate with firebase login and approve the server with claude.
Ordinary product events use Wire when configured. The Firebase MCP connection does not change that routing.